Start
Start with definition files
At this point, you've probably already learned how to quickly serve flama applications, and ML models codeless, with the run and serve methods, respectively. But that's not the end of the story. Indeed, we could say the fun part is just about to start.
Flama CLI comes with the very convenient command start, which builds on top of what we have already seen, and take it to the next level. The start command is thought for a highly customised way of serving apps and/or models by specifying their details and characteristics in definition files, which allows us to have all the specs related with the deployment as code. Definition files may be control versioned, which makes the deployment process reproducible and resilient.
A Flama definition file consists of a set of blueprints which explains how to build a custom application. This file includes the specifics of the base Flama application we build on, routes regarding where the documentation and schemas will be served, besides the models we want to add from our local system.
As always, the command flama start also comes with help:
flama start --help
Usage: flama start [OPTIONS] [FLAMA_CONFIG]  Start a Flama Application based on a config file.
  Start a Flama Application with the configuration specified in <FLAMA_CONFIG>  file (default: flama.json).╭─ Options ────────────────────────────────────────────────────────────────────╮│   --create-config     Create a config file: 'simple' only includes the       ││                       host and port of the webserver; 'full' includes all    ││                       the details of the webserver.                          ││   --help              Show this message and exit.                            │╰──────────────────────────────────────────────────────────────────────────────╯
Your first definition file
The best way to start with definition files is by example. For this purpose, you can simply run:
flama start --create-config simpleThis command line will produce a simple definition file which will be stored in your current folder as flama.json.
Let's dig into it a bit:
{ "app": { "debug": false, "title": "API title", "version": "0.1.0", "description": "API description", "schema": "/schema/", "docs": "/docs/", "models": [{ "url": "/model-url/", "path": "model-path.flm", "name": "model-name", "channel_scanner": null, "tool_scanner": null, "tool_parser": null, "params": null, "serving": null }] }, "server": { "host": "127.0.0.1", "port": 8000 }}Sections
As you can readily check, the definition file consists of a set of sections which define our application. The first section you will find is "app", which encapsulates all the options defining an application, including the models and routes that can be served in it. In particular, we find the following fields, which we can populate according to our needs:
- Debug: Whether the app is in debug mode or not. This is the same as the parameter
--app-debugof serve. - Title: This is the name of the app which will be serving the ML models (e.g., "ML API"). This is the same as the
parameter
--app-titleof serve - Version: Version of the application (e.g., "0.1.0"). This is the same as the parameter
--app-versionof serve - Description: Description of the application (e.g., "API serving several models"). This is the same as the
parameter
--app-descriptionof serve - Schema: Route where the API schema will be served (e.g., /schema/).
- Docs: Route where the API documentation website will be served (e.g., /docs/)
- Models: This represents a list of models that will be served via our API. Each model will be represented by the
parameters url (e.g., "/model-url/"), path (e.g., "model-path.flm"), and name (e.g., "model-name").
For generative models, additional options are available: channel_scanner, tool_scanner, and tool_parser
control decoder behaviour, params sets default generation parameters, and serving selects the serving
dialects (e.g.,
["native", "openai"]). All default tonull(auto-detect or omit).
We can refer to this way of specifying the app properties as import dictionary. But, there is still another way of populating the "app" section of the definition file with a single line, which is the import string. Indeed, we have already used the import strings when we introduced the command run, the import string was the path to the app object expressed in the format module:attribute (e.g. src.main:app).
Examples
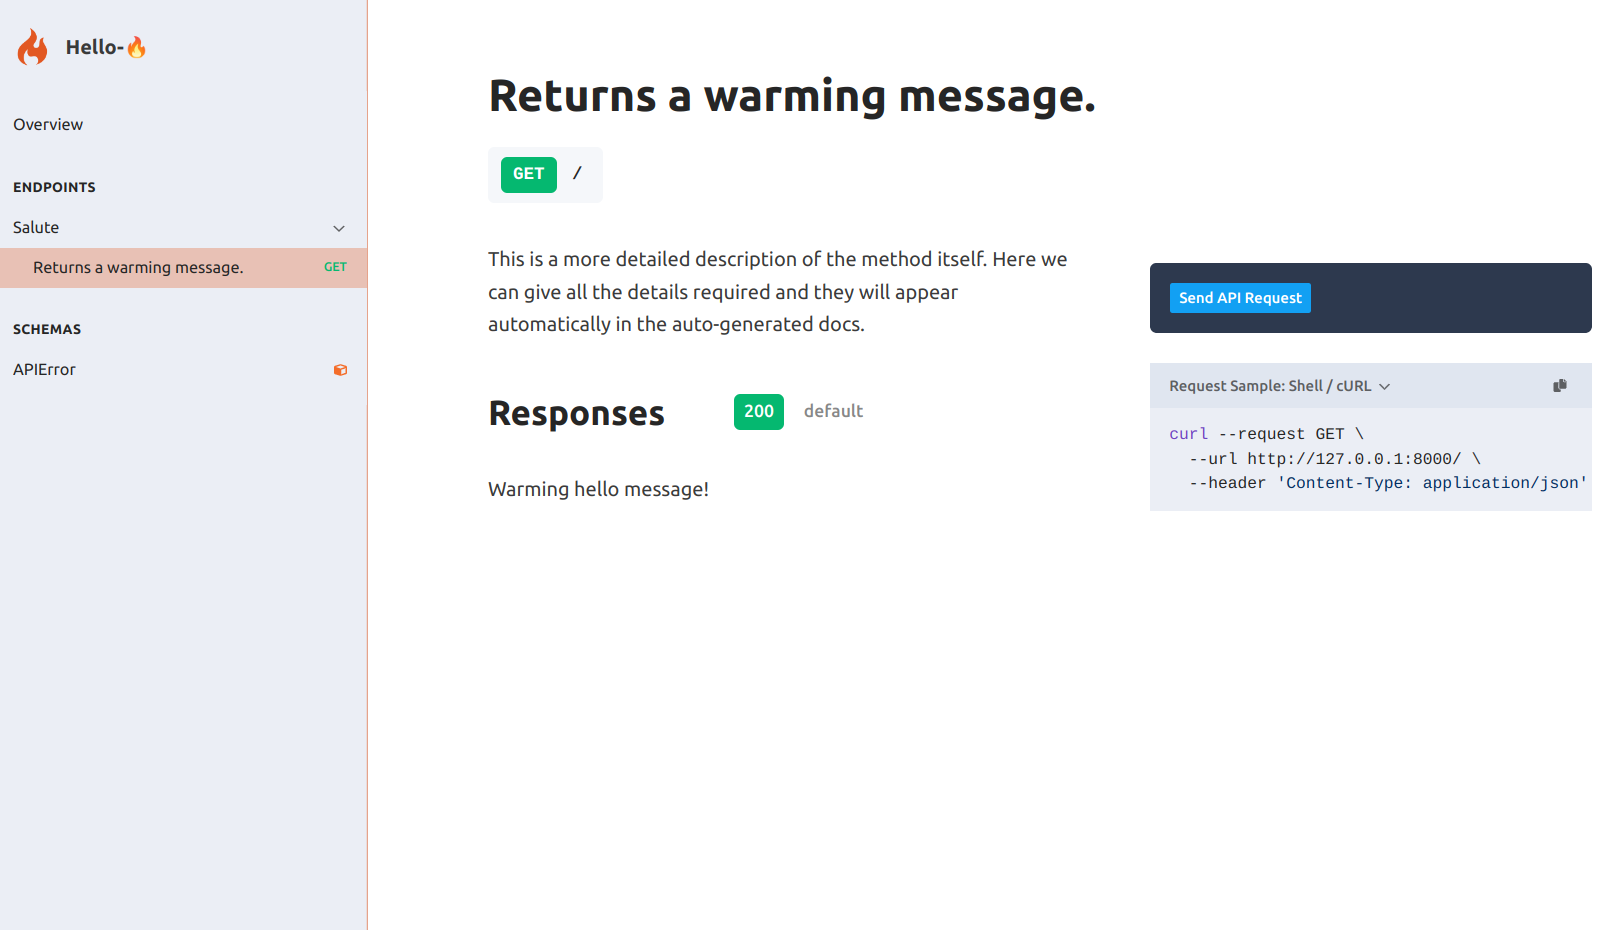
Serving a Flama App
The easiest way of using definition files is by populating the app field via import string. Let's try the following definition:
{ "app": "examples.hello_flama:app", "server": { "host": "127.0.0.1", "port": 8000 }}Now, we can run the following command (assuming your definition file is named flama.json):
flama start flama.json
INFO:     Started server process [96911]INFO:     Waiting for application startup.INFO:     Application startup complete.INFO:     Uvicorn running on http://127.0.0.1:8000 (Press CTRL+C to quit)
Open the browser and check the docs URL http://127.0.0.1:8000/docs/ for your enjoyment.
Serving a single model
Let us start with the simplest example, which is using a definition file which only includes a single ML model:
{ "app": { "debug": false, "title": "Scikit Learn Model API", "version": "0.1.0", "description": "This API is serving a scikit-learn classifier", "schema": "/schema/", "docs": "/docs/", "models": [{ "url": "/sklearn/", "path": "sklearn_model.flm", "name": "sklearn-classifier" }] }, "server": { "host": "127.0.0.1", "port": 8000 }}We only have to run the following command to get it running (assuming your definition file is named flama.json):
flama start flama.json
INFO:     Started server process [94140]INFO:     Waiting for application startup.INFO:     Application startup complete.INFO:     Uvicorn running on http://127.0.0.1:8000 (Press CTRL+C to quit)
Open the browser and check the docs URL http://127.0.0.1:8000/docs/ for your enjoyment.

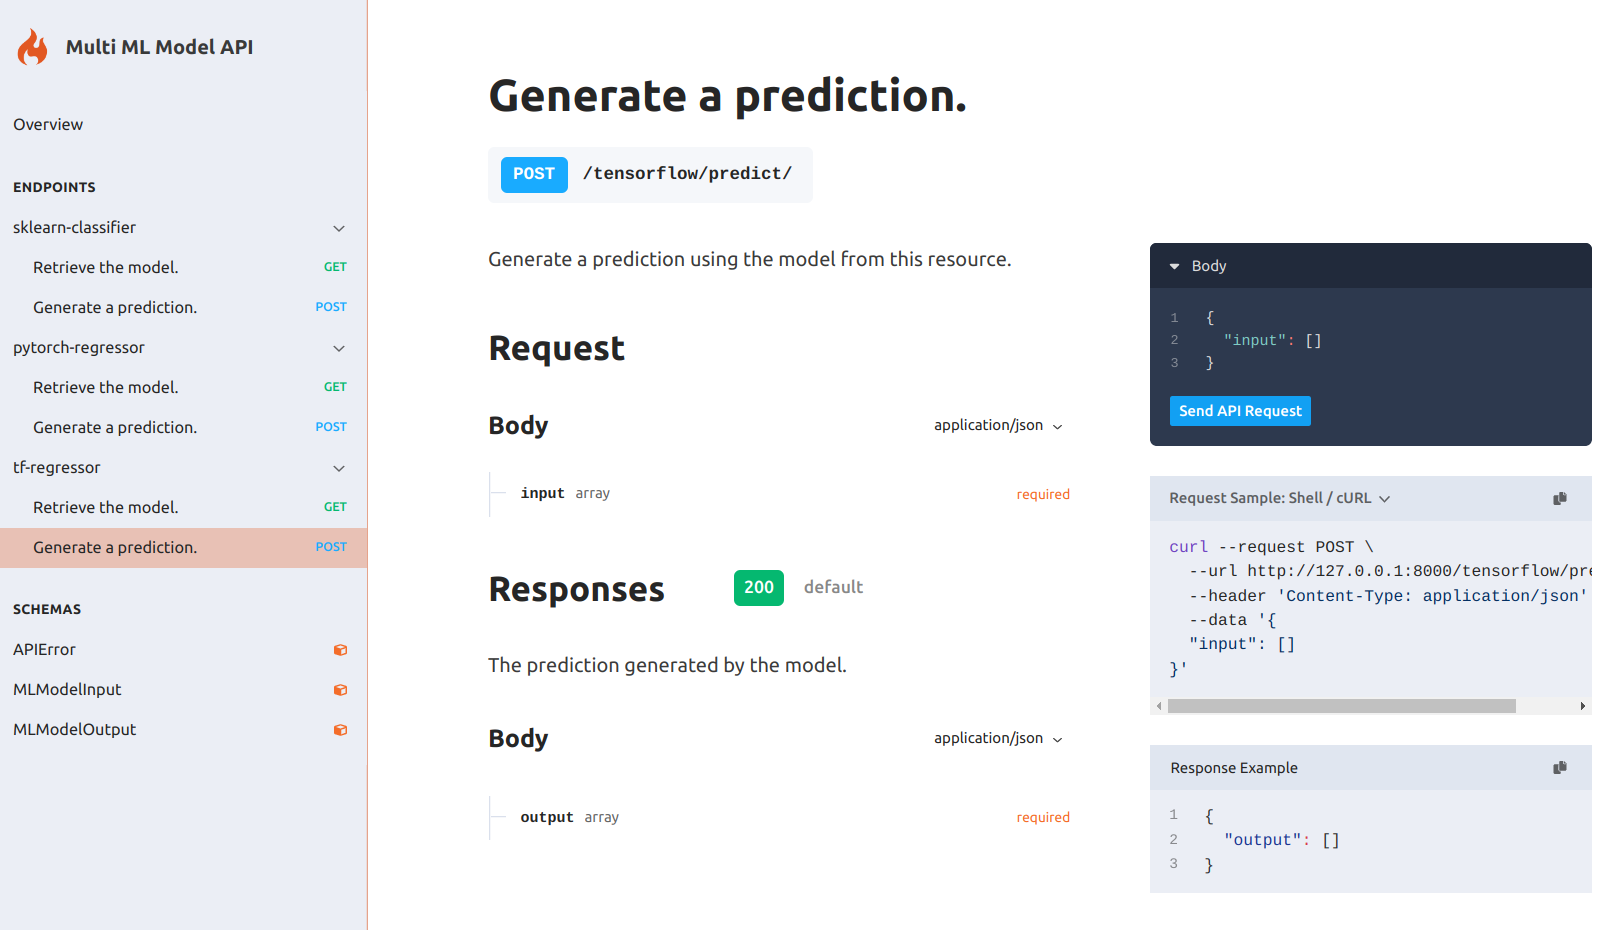
Serving several models
Now, we can take Flama CLI to its maximum potential by specifying how to serve multiple models, and other configuration parameters of the app, in a single definition file. Let's try the following example:
{ "app": { "debug": false, "title": "Multi ML Model API", "version": "0.1.0", "description": "This API is serving multiple machine-learning models codeless", "schema": "/schema/", "docs": "/docs/", "models": [ { "url": "/sklearn/", "path": "sklearn_model.flm", "name": "sklearn-classifier" }, { "url": "/pytorch/", "path": "pytorch_model.flm", "name": "pytorch-regressor" }, { "url": "/tensorflow/", "path": "tensorflow_model.flm", "name": "tf-regressor" } ] }, "server": { "host": "127.0.0.1", "port": 8000 }}Now, we can run the following command (assuming your definition file is named flama.json):
flama start flama.json
INFO:     Started server process [96911]INFO:     Waiting for application startup.INFO:     Application startup complete.INFO:     Uvicorn running on http://127.0.0.1:8000 (Press CTRL+C to quit)
Open the browser and check the docs URL http://127.0.0.1:8000/docs/ for your enjoyment.